Cleaning a couple of parts

December 31st, 2007

Penny (my wife), Sebastian (my son) and I are spending New Years Eve with my parents this year, and as such, I get to do a little work on the car again (it’s been a good week). It was quite a hot day, so I only cleaned up a couple of things.

I started out by cleaning the heater controls. They had quite a bit of dust and grim on them. I cleaned it all off and then applied a bit of WD-40 to the controls and in the cable pulls. This freed up the mechanisms a lot and they move very smoothly.

I then started some work on the rear bumper. I decided not to get it re-chromed at this point in time. It does have a few imperfections, but it will do for now. I think I might need to build a new page of things to do after she is back on the road! I had been applying Penetrene to the nuts all morning and I was able to get a few of them off. I was mainly trying to get the overriders off. But, as always, the last nut seized and I ended up snapping the bolt. Luckily, I had a spare set of overriders that I was going to use anyway. The bumper didn’t come up too bad, but I still need to paint the brackets and the inside of the bumper as they are quite rusty.
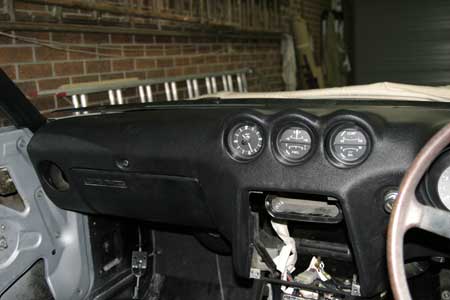
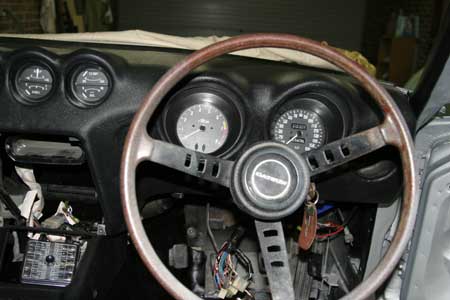
The Dash is in.

December 29th, 2007

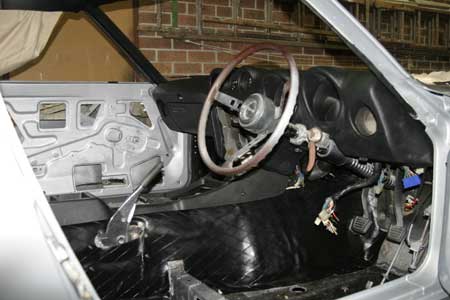
The plan for today was to get the dash into the car. Before we could do this though, we had to get the tunnel trim in along with the ducts in the dash. We were worried that installing the tunnel trim would be tricky as it is quite long and the contact glue on the vinyl might have stuck to itself. Luckily though, it went in quite easily and looks great.

After cleaning up the ducts, we installed them into the dash. It took a bit of fiddling around to get them installed. We also installed the glove box insert. Even though books day that it can be installed after the dash is installed, I thought that I would save the trouble and get it done before putting the dash in. The last thing to do was to replace all of the globes in the instruments.

The dash went into the car fairly easily. It wasn’t quite lining up but then I adjusted the bottom of the dash and it all fell into place. With the dash installed, we can start working towards getting the car running again, woot!

Installing the vinyls

December 27th, 2007

We continued work on the tunnel insulation today, cutting the rear section out of a new roll of the double-fluff-with-bitumen insulation. To stick it onto the tunnel, we used spray on contact adhesive. The glue sprayed on quite easily and once it went tacky, we placed and thumped the insulation into place. After a fare bit of thumping to make sure that it was nice and flat, the insulation was stuck down nice and firm.

We then moved onto installing the vinyls. We started with the roof lining. Once again we used spray contact adhesive, but this time one that is designed for high temperature conditions. We marked the center of the vinyl with masking tape to make lining it up in the car easier. We made sure that the center was lined up right and pressed it to the roof. From there, we worked our way to the driver side and then the passenger side, making sure that there were no ripples. The last step was to tuck it in around the header and and side pillars.

With the roof lining in, the next step for the day was the header trim. For this, we had to first adhere the sponge and then the vinyl. The kit that I had bought needed these pieces to be trimmed to size. Luckily, the vinyl does not need to be glued all over, but installation was still quite tricky. The vinyl is held in place with a plastic molding. But, and here is the tricky part, the molding is hidden by the vinyl. To do this, the vinyl needs to have a double fold. It took us a while to get it right, but in the end it didn’t come up too bad for a couple of amateurs. There are a couple of ripples, but nothing too drastic. We then used contact glue to glue the vinyl to the seam that the windscreen rubber is installed on.

The last vinyl that we installed today was the A-pillar and side trim. Installation of this vinyl was very similar to the header, except that there is a part of it that needs to be folded as it goes over the header trim. With the plastic molding in place, we glued the vinyl in place along the A-pillar. The only thing left to do with this vinyl is to glue it along the door jamb, but this will require loosening off the rear quarter window, so we left it for another day.

Floor and Firewall coverings

December 15th, 2007

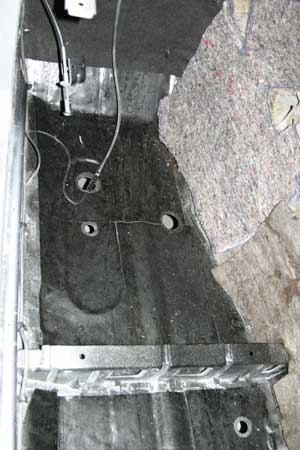
As we had to do some repair work to the floor (and had to make sure there was no hidden rust), I had removed the bitumen lining on the inside of the car. Today, we re-applied new sheets of bitumen to reinforce the floor and to help with the sound proofing. Even after the first sheet was laid, the floor already lost the tinniness when rapped with your knuckles. Once all of the floor was covered, it sounded very solid.

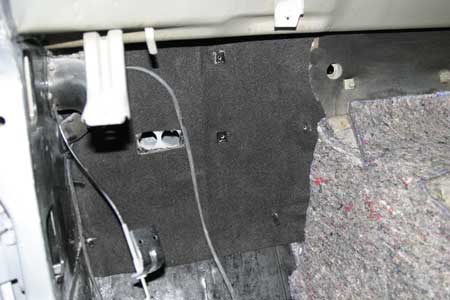
When I took the A/C and heater core out from the inside of the car, we found that part of the firewall covering had deteriorated to the point of uselessness. Dad got this material that is called Floor and Firewall Sound Insulation. It is two layers of fluffy material sandwiching a layer of bitumen. We used the old bits and pieces that I had kept as a “pattern” and cut a new piece for the firewall. Once all of the holes were cut we made sure that the new piece would fit and it was then covered in a black material. We fitted it to the firewall and it looks great.

The new insulation stuff looked pretty good, so we decided to take the old stuff off the tunnel and replace it. We took off the piece that is at the front of the tunnel (which would be under the heater core and dash. We used the old piece as a template and cut the new piece. The new stuff is a little thicker than the old stuff, so we wanted to make sure that the vinyls would still fit. I got out the old tunnel vinyl and it looks like it should fit over the new insulation without a problem.

While we had the old tunnel vinyl out, we decided that it was in pretty good shape and we might be able to still use it. The new one that I bought from the states would be no good to use as the hole for the hand brake is on the wrong side of the tunnel. Dad had a vinyl cleaner and a trim polisher. We first hit the vinyl with the cleaner and a scrubbing brush. This got the most of the dirt off but there were some more stubborn stains that need a quick going over with some turps. Once the dirt was removed, we used the trim polish. The vinyl came up really well and there is only a small tear that will be hidden by the hand brake boot.

Side Windows Are In!

December 8th, 2007

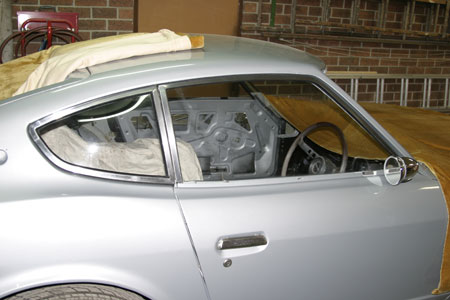
Today Dad and I continued to focus on getting the side windows in. Last weekend we had completed getting the door windows in, along with the lock mechanisms. We also took the rear quarter windows apart and cleaned up all of the components. Today, we put the quarter windows together again using the new rubbers.

Dad fixed up the frames as they had come apart due to some rust. He made a new bracket and riveted the stainless steel frame to it. He also coated the new bracket with some SW2 to seal them. The new rubbers were a little tricky to get onto the glass, but we got there. The next tricky part was getting the glass and rubber into the steel frame and seated properly. With a little gentle persuasion (thanks to the rubber mallet), the frames we screwed together. We then glued the outer rubbers on and once dried, tried to mount the windows onto the car.

Try as we might though, we just could not get the windows to sit properly on the car. The new rubbers just would not compress enough for us to be able to screw them in place. They were so far out, that when we closed the doors, the window frames on the doors would just hit the quarter window frames. We ended up taking a slice of the outer rubber off and they then fit in quite snugly. The rubber was still squeezing up on the body sealing nicely and the alignment of the window was spot on.