Oil Leak Investigating

January 13th, 2007

Over the last week or so, I have ordered the rear shockers from The Z Store in the US. They had told me that they didn’t have stock at the moment, but expected it in in the next couple of days.

Whilst work has been stalled on the back-end of the car, Dad and I decided it was time to tackle the engine and gearbox. We started out by getting the starter motor, air conditioning compressor and alternator off. Next, we tackled getting the gear box off. With the gear box off, we discovered one source of oil leak. Looks like both seals on the gear box need to be replaced.

The good news is that the big end seal has already been replaced and looks to be in good condition. A lot better than the state of the front seal. We took off the harmonic balancer to find that the seal must be the original seal from the factory. It was very hard and brittle and had scored the shaft of the harmonic balancer! We cleaned the shaft up a bit, but it was scored enough that we did not want to simply put it back on. We would need to find a way to repair it.
A Bit More Painting

January 6th, 2007

Today Dad and I decided to focus a little more on under the car. We used the gantry to hoist the back of the car in the air again to allow us to give the back-end a good degrease and to clean off any remaining dirt and residue. It seemed to come off a lot easier than when I did the front-end, probably because we used the degreaser neat and let it soak for a lot longer.

Once the degreaser had done its thing, we rinsed everything down and let her dry out. We then got out the spray gun for the sound deadener. What a messy job that was. Sound deadener went all over the place. Best thing was though, we got it all over the right places too 😉 Under the car has now had a good coat of sound deadener, replacing a lot of the stuff that I stripped off due to it going bad because of all the oil leaks.

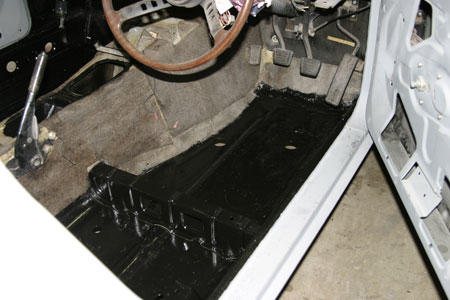
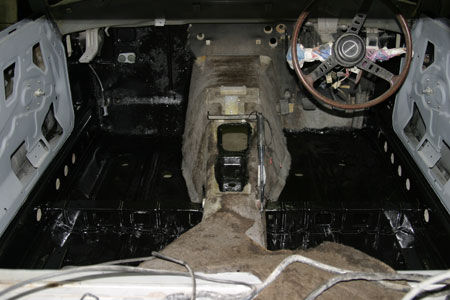
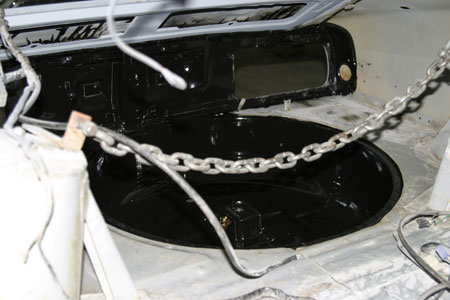
Once the car was back on all four wheels. I decided that it was time to make the inside of the car look like it was ready for the next stage. I painted all exposed floor with POR-15. This included both floor pans, the passenger side firewall, the spare wheel carrier and the inside of the rear of the car (where the taillights go). This should seal things nicely and will hopefully slow the rust down.

Brake Repairs

January 4th, 2007

Dad took quiet a bit of the brake and clutch system to BGT Clutch and Brakes, in Hawthorn, to get serviced. He took with him both the master cylinders, the brake power booster, the clutch slave cylinder, the front calipers and all of the damaged brake lines.

They said that it would take a little over a week to get everything re-conditioned. It will be good to have a bit more faith in the brakes once it is all done.

Suspension Reassembly, Part II

December 30th, 2006

Today we finished putting all of the front suspension together. I’m very happy with the way that things have turned out. It looks very schmick, with all of the components painted black. Once we got her on four wheels again, we were shocked at how stiff the front suspension was now. I hope that it isn’t too stiff. I had to stand on the cross member before we could bounce the car! I suppose that the engine is not in either, so once the extra weight is in the car, things should be right.

Unfortunately, the rear shockers are not available in Australia (from KYB). I will have to place an order with someone from the US and get them to ship them over here. Looks like work on the back-end will come to a bit of a grind.

Once work was done on the suspension, I got to finishing off getting the brake and fuel lines off the car. There were only a couple more bolts that had to be taken off and everything would be out. It was a little tricky to get the lines that went from the front of the car to the back, but we got there in the end. The only thing that we snagged on was getting the brake lines off at the rear wheels. The nuts would just not give an inch and they started to strip. We decided that a bit of “gentle” heat was required. Once heated, and the rubber hoses popping, the nuts came off. We will have to get those lines replace as the nuts were damaged to badly.

Suspension Reassembly, Part I

December 27th, 2006

Today I had a few spare hours to work on the car. We started out by putting the shockers into the struts, compressing the springs, putting on the rubber boots and putting the strut tower (what I call it) all together. I put a little oil inside the strut casing to try to help slow down any rusting as well, but I am hoping that the rubber boot will stop a lot of water and muck from getting in there.

With the towers together again, we put them in place and I started on getting the steering rack in place. I went to put on the new mounting bushes, but one of them was to wide and would not fit into the slot, no matter what I tried. I resorted to putting the old ones back one (they were pretty good still anyway). With the steering rack in place I started to get the other parts on.

When I was putting on the track control arm, I found that the diagram in the books called for self-locking nuts. The nuts that had been used were not self-locking, and there were no spring washers either. I went for a drive to see if I could get some spring washers, but the fastener place was shut. I put the track control arm in place and will have to get the spring washer later.

As I only had a few spare hours, I only got the passenger side track control arm on and was just about to get the radius arm on when I had to pack it in for the day. Next time, I should get it back on four wheels again. Hopefully before the New Year, like I had hoped.

I hope you all had a good Christmas and that the New Year is a fun and adventurous one. Cheers.